How to Build a Podcast Studio in 2026
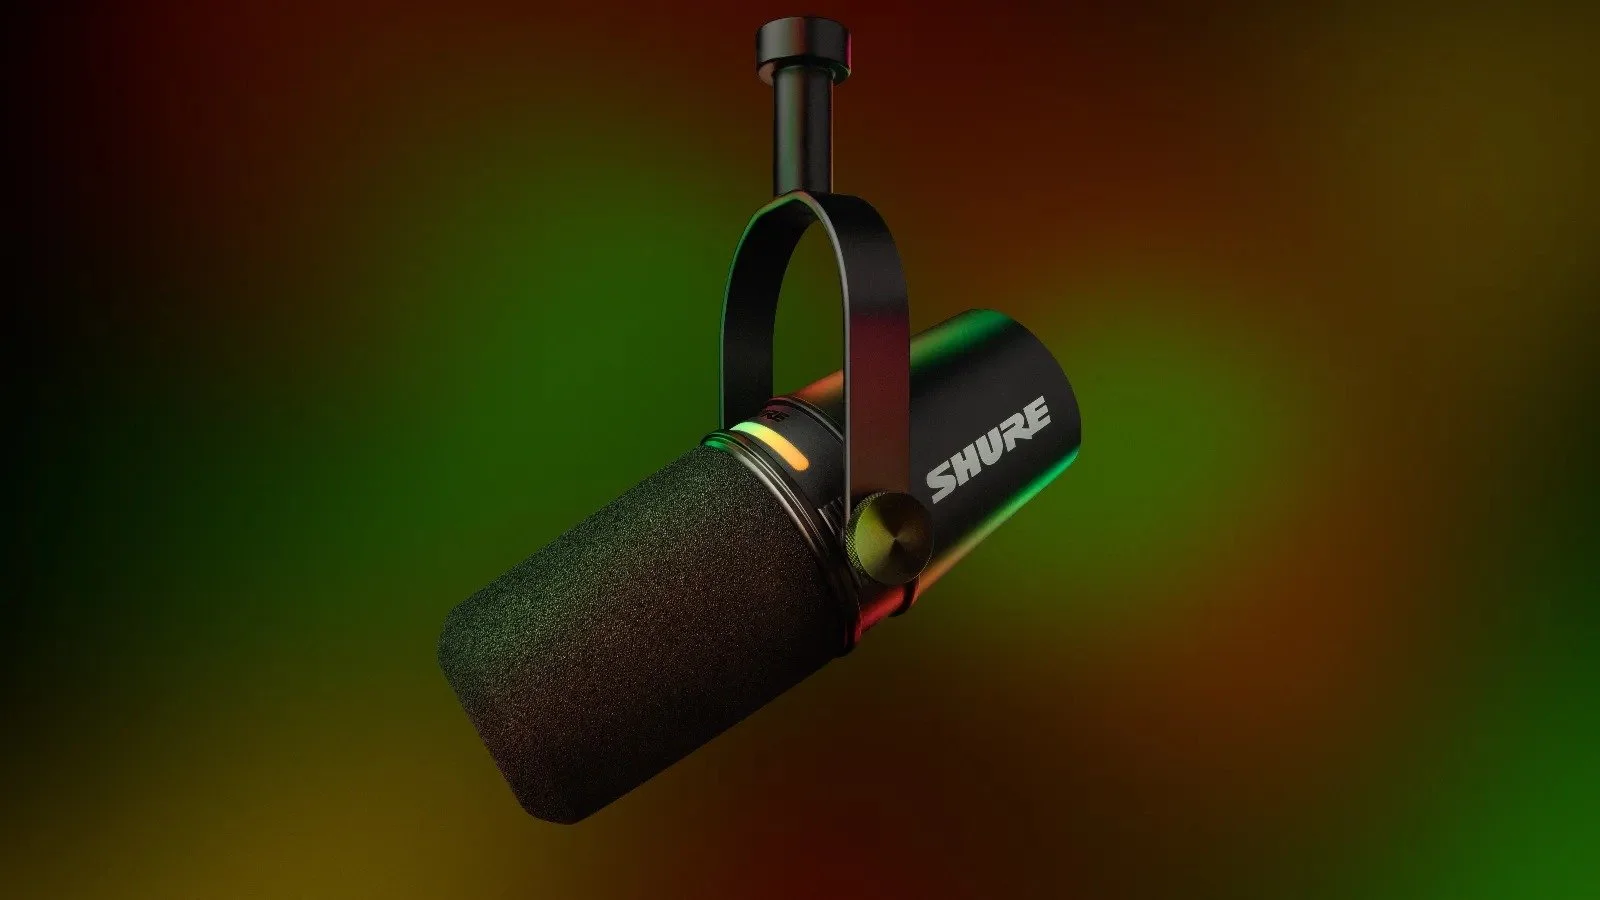
The MV7+ replaced the legendary SM7B as Shure’s top podcasting pick. Its built-in LED touch panel lets you control gain, monitoring, and muting without ever touching your computer. Photo: Shure Inc.
I have spent over 12 years building studios for brands, agencies, and independent creators across North America. If there is one thing I have learned, it is this: your audience will forgive an average set, but they will never forgive bad audio or a webcam-quality image.
This guide is not a list of every microphone on Amazon. It is a focused, opinionated breakdown of exactly what I would recommend if you walked into my office tomorrow and said “I want to start a podcast.” I have narrowed it down to the equipment that delivers real professional results — and I have organized it into three complete kits so every piece works together.
My philosophy is simple: invest well once. Buying cheap equipment and replacing it six months later always costs more than doing it right the first time.
What You Need to Get Right
Before we talk gear, let me be direct about what actually matters in podcast production:
1. Audio is non-negotiable. If your podcast sounds like a phone call, people will close the tab in 30 seconds. It does not matter how good your content is. Invest in a real microphone, treat your room, and monitor with proper headphones. This is the foundation of everything.
2. If you are doing video, commit to it. A webcam with flat lighting looks worse than no video at all. Either invest in a proper camera and lighting setup, or release audio-only. There is no middle ground here. Half-done video actively hurts your brand.
3. Your room matters more than your gear. A $400 microphone in an untreated room will sound worse than a $200 microphone in a properly treated space. Acoustic treatment is not optional — it is the single highest-impact upgrade you can make.
Audio: The Foundation
Microphone
For podcasting, you want a dynamic microphone. Unlike condenser mics, dynamics reject background noise naturally — perfect for home studios and office spaces that are not acoustically perfect.
My recommendation: Shure MV7+
★★★★★ | ~$350 CAD
This is the microphone I recommend to most clients. It works over both USB and XLR, which means you can start with a simple USB connection to your computer and upgrade to a professional interface later without buying a new mic. The built-in noise reduction and EQ presets are genuinely useful, not gimmicks. If you are building a podcast for your brand and want one microphone that will last years, this is it.
Amazon.ca · Amazon.com
For larger budgets: Shure SM7dB
★★★★★ | ~$600 CAD
The SM7dB is the modern version of the most iconic broadcast microphone ever made. The built-in preamp eliminates the need for expensive external gain boosters that the original SM7B required. If you have the budget, this is the industry standard for a reason — it sounds incredible on virtually every voice type. XLR only, so you will need an audio interface.
Amazon.ca · Amazon.com
Audio Interface (XLR Mics Only)
If you choose the SM7dB or any XLR microphone, you need an interface to connect it to your computer.
My recommendation: Focusrite Scarlett 2i2 (4th Gen)
★★★★★ | ~$220 CAD
There is a reason this is the best-selling audio interface in the world. Clean preamps, rock-solid drivers, and it just works. Two inputs means you can run two microphones for interviews. No learning curve, no troubleshooting — plug in and record.
Amazon.ca · Amazon.com
For all-in-one production: RODECaster Duo
★★★★☆ | ~$550 CAD
If you want built-in sound pads, effects, multi-track recording, and the ability to bring in phone calls or remote guests through a single device, the RODECaster Duo replaces your interface, mixer, and effects processor in one unit. Overkill for a solo podcast, but perfect for interview-format shows or multi-host setups.
Amazon.ca · Amazon.com
Headphones
Audio-Technica ATH-M50x
★★★★★ | ~$200 CAD
Closed-back monitoring headphones that let you hear exactly what your audience will hear. Comfortable enough for 2-hour recording sessions. These are an industry standard in studios worldwide — accurate, durable, and the detachable cable means you will not be replacing them when a cable wears out. Do not use earbuds or open-back headphones for podcast monitoring.
Amazon.ca · Amazon.com
Video: The Differentiator
This is where I have strong opinions. As a Director of Photography who has worked with over 180 brands, I can tell you: the quality of your image is what separates “podcast” from “professional media.” Companies like yours should not look like a Zoom call.
For reference, my personal production setup runs Sony FX3 and FX30 cinema cameras — fully professional cinema line gear. You do not need to go that far for a podcast, but the cameras I recommend below share the same Sony ecosystem and color science.
Camera
A real camera with an interchangeable lens will give you shallow depth of field (that blurred background look), accurate colors, and a cinematic quality that no webcam can replicate.
Best value: Sony ZV-E10 II
★★★★★ | ~$1,000 CAD (body)
Built specifically for content creators. Incredible autofocus, 4K video, flip screen, and Sony’s color science which is the best in class for skin tones. Compact enough to mount anywhere in your studio. Start with one and add more as your production grows. Pair it with a Sigma 16mm f/1.4 (~$450 CAD) for that professional shallow depth of field look.
Amazon.ca · Amazon.com
Professional tier: Sony A7 IV
★★★★★ | ~$2,500 CAD (body)
Full-frame hybrid camera that excels at both photo and video. 33MP sensor, 4K 60fps, and Sony’s latest autofocus system. The larger sensor means better low-light performance, shallower depth of field, and an image quality that is visibly superior. If your podcast is a flagship content piece for your brand, this camera will make it look like a real production. Pair with a Sony 24mm f/2.8 G (~$600 CAD) for a versatile, compact setup.
Amazon.ca · Amazon.com
Also excellent: Sony A7C II
★★★★★ | ~$2,800 CAD (body)
Full-frame in the most compact body Sony makes. Same sensor technology as the A7 IV but in a smaller, lighter package. Perfect if space is tight in your studio or if you want something that doubles as a travel camera. The flip screen makes it ideal for solo recording when you need to check framing yourself.
Amazon.ca · Amazon.com
The Multi-Camera Advantage
You can absolutely start with one camera — and you should if budget is a concern. But the ideal podcast setup uses three cameras:
Camera 1 (Wide shot): Captures both host and guest in frame. This is your safety shot and your establishing angle. A wider lens like a 16-24mm works best here.
Camera 2 (Host close-up): Tight framing on the host. A 35-50mm equivalent gives you that intimate, professional close-up with beautiful background separation.
Camera 3 (Guest close-up): Same as camera 2 but on the guest. This is what allows you to cut between speakers naturally, just like a professional interview show.
With three angles, your editor has the flexibility to create dynamic, engaging content that keeps viewers watching. Single-camera podcasts can feel static. Three cameras is the best-case scenario and what I build for clients who want their podcast to compete with the best content on YouTube and Spotify.
Start with one camera and add cameras 2 and 3 as your show grows. The beauty of staying in the Sony ecosystem is that all three cameras share the same color science, autofocus system, and lens mount — so your footage cuts together seamlessly.
Lighting
Let me be clear: a ring light is not studio lighting. It creates flat, unflattering light with a distinctive ring-shaped reflection in your eyes that immediately says “amateur.” And small, cheap LED panels from Amazon will not give you the soft, professional quality your brand needs.
Proper lighting means a key light that is large enough to create soft, flattering shadows on your face. For podcast studios, I recommend LED panels or LED fresnels with diffusion.
My recommendation: Aputure Amaran 200D
★★★★★ | ~$350 CAD
A proper studio light with Bowens mount, which means you can attach professional softboxes and modifiers. 200W of daylight-balanced output is enough to light any podcast set beautifully. Add a Lantern 65 softbox (~$100 CAD) and you have the kind of soft, wrapping light you see on professional interview shows. This is the minimum I would recommend for a key light.
Amazon.ca · Amazon.com
Budget-friendly alternative: Elgato Key Light
★★★★☆ | ~$250 CAD
If you want simplicity over versatility, the Elgato Key Light is a solid panel light with desk-clamp mounting, WiFi control, and 2800 lumens. It will not accept professional modifiers like the Aputure, but for a clean, well-lit setup it gets the job done. Do not buy the smaller “Key Light Air” — it is not bright enough for serious use.
Amazon.ca · Amazon.com
You will want at least two lights — one key light and one fill or hair light. For a three-camera setup, budget for three lights minimum.
The Details That Matter
Boom Arm
RODE PSA1+
★★★★★ | ~$130 CAD
A boom arm keeps your microphone off the desk (eliminating vibration noise) and at the correct position near your mouth. The PSA1+ has smooth, internal spring tension and studio-grade build quality. Cheap boom arms sag, creak, and break. This one will outlast the rest of your gear.
Amazon.ca · Amazon.com
Acoustic Treatment
Acoustic Foam Panels (12-pack)
★★★★☆ | ~$40 CAD
Remember what I said about your room mattering more than your gear? This is the most affordable upgrade that makes the biggest difference. Place panels at first reflection points — the walls directly to your left, right, and behind your monitor. Even basic foam panels will dramatically reduce echo and room noise.
Amazon.ca · Amazon.com
Three Complete Kits
Here is where it all comes together. Each kit is a coherent system where every component is matched in quality — no weak links. Quality is something I never compromise on, and neither should you.
Starter Kit — ~$750 CAD
For: Brands launching their first audio-only podcast. Professional quality without overinvesting before you have validated the format.
Shure MV7+ (USB mode — no interface needed) — $350
Audio-Technica ATH-M50x headphones — $200
RODE PSA1+ boom arm — $130
Acoustic Foam Panels (12-pack) — $40
Total: ~$720 CAD
This kit sounds genuinely professional. The MV7+ on USB gives you broadcast-quality audio out of the box. When you are ready to upgrade to video or a multi-mic setup, the MV7+ switches to XLR seamlessly. This is investing well once.
Professional Kit — ~$2,500 CAD
For: Companies serious about video podcast as a content pillar. One camera to start, with a clear upgrade path to multi-camera.
Shure MV7+ (XLR mode) — $350
Focusrite Scarlett 2i2 — $220
Audio-Technica ATH-M50x headphones — $200
RODE PSA1+ boom arm — $130
Sony ZV-E10 II (1 camera) — $1,000
Sigma 16mm f/1.4 lens — $450
Elgato Key Light (x1) — $250
Acoustic Foam Panels (12-pack) — $40
Total: ~$2,640 CAD
Add a second light (~$250) and you are at around $2,900 all in. This setup will produce content that looks and sounds indistinguishable from what major media companies produce. When you are ready, add two more ZV-E10 II bodies for the full three-camera experience.
Studio Kit — ~$10,000+ CAD (Best Case Scenario)
For: Organizations building a dedicated production space with a three-camera setup. This is what I build for clients who want their podcast to be a competitive advantage.
Shure SM7dB microphone — $600
RODECaster Duo production console — $550
Audio-Technica ATH-M50x headphones (x2) — $400
RODE PSA1+ boom arm (x2) — $260
Sony A7 IV (Camera 1 — wide shot) — $2,500
Sony A7 IV (Camera 2 — host close-up) — $2,500
Sony A7 IV (Camera 3 — guest close-up) — $2,500
Sony 24mm f/2.8 G (wide) — $600
Sony 50mm f/1.8 (close-ups, x2) — $500
Aputure Amaran 200D key light — $350
Aputure Amaran 200D fill light — $350
Aputure Amaran 200D hair/accent light — $350
Softboxes (3x Lantern 65) — $300
Acoustic Panels (professional treatment) — $80
Total: ~$11,840 CAD
This is a legitimate production studio. Three Sony A7 IV cameras give you cinematic full-frame video from every angle. The SM7dB through the RODECaster Duo delivers broadcast-grade audio. Three Aputure 200Ds with softboxes create the kind of lighting you see on shows like Hot Ones or Diary of a CEO. For my own productions, I shoot on Sony FX3 and FX30 cinema cameras — but the A7 IV delivers 90% of that quality at a fraction of the price. This is the level of quality I refuse to compromise on, and it is exactly what separates amateur content from professional media.
What I Would Never Recommend
After building dozens of studios, here is what I tell every client to avoid:
Generic microphones under $100. The sub-$100 condenser mics flooding Amazon pick up every sound in your room — keyboard typing, air conditioning, street noise. You will spend more time fixing audio in post than you saved on the purchase. A $30 microphone is not saving money, it is wasting time.
Ring lights as your main lighting. Ring lights create a flat, characterless look with that distinctive circular reflection in your eyes. They were designed for phone selfies, not for professional video production. For the same price as a good ring light, you can get a proper LED panel that actually flatters your face.
Webcams for video podcasts. If you are going to do video, use a real camera. A webcam compresses your image, struggles in anything but perfect lighting, and screams “I did not invest in this.” If the budget is not there for a camera yet, release audio-only until it is. That is the honest advice.
My stance is simple: I never compromise on quality, and I do not think you should either. Every shortcut you take shows up in the final product. Your audience can tell the difference, and so can your clients.
Recording Software
You do not need to spend hundreds on recording software. Here is what I recommend:
Audio: Riverside.fm or Descript — Both record locally on each participant’s device, giving you studio-quality audio even from remote guests. Riverside starts free; Descript at $24/month also handles editing and transcription.
Video: OBS Studio (free) — For local recording, OBS captures your camera feed in full quality. Free, open-source, and used by professional streamers and studios worldwide.
Editing: DaVinci Resolve (free) — Professional-grade video and audio editing. The same software used on Hollywood films. The free version has everything you need for podcast production.
Get the Free Studio Planning Checklist
I have put together a one-page checklist that covers everything in this guide — room prep, equipment list, acoustic treatment placement, and cable routing. It is the same document I give to clients before we start building their studio. Drop your email below and I will send it straight to your inbox.
[Subscribe to get the free checklist →]
Final Thoughts
Building a podcast studio is not about buying the most expensive equipment. It is about making intentional choices that match your goals and your audience’s expectations. A well-planned $750 setup will outperform a $5,000 collection of mismatched gear every time.
Start with audio. Get that right. Then add one camera when you are ready. And when the show is established, scale to three cameras for that multi-angle production quality that keeps viewers engaged. Whatever you do, treat your room. A $40 pack of foam panels will do more for your sound than upgrading from a $200 microphone to a $600 one.
The best-case scenario? A three-camera, properly lit, acoustically treated studio with broadcast-grade audio. That is what I build for my clients, and it is what I recommend if you are serious about making your podcast a flagship piece of content for your brand.
If you need help designing a studio setup tailored to your brand and space, feel free to reach out — I work with companies across Toronto and the GTA to build production capabilities that last.
About the Author
Oleg Litvin is a media consultant and Director of Photography based in Toronto with over 12 years of experience in video production, photography, and studio design. He has worked with 180+ international brands including universities, agencies, government organizations, and businesses across North America. Oleg shoots on Sony FX3 and FX30 cinema cameras and specializes in helping companies build professional in-house production capabilities — from podcast studios to full video production workflows. He speaks English, Spanish, Russian, and French.
This article contains affiliate links. Purchases through these links support this site at no extra cost to you. Every product recommended here is something I would confidently put in a client’s studio. Image sources: Product images are property of their respective manufacturers (Shure, Sony, Audio-Technica, Focusrite, RODE, Aputure, Elgato). Used for editorial and review purposes.
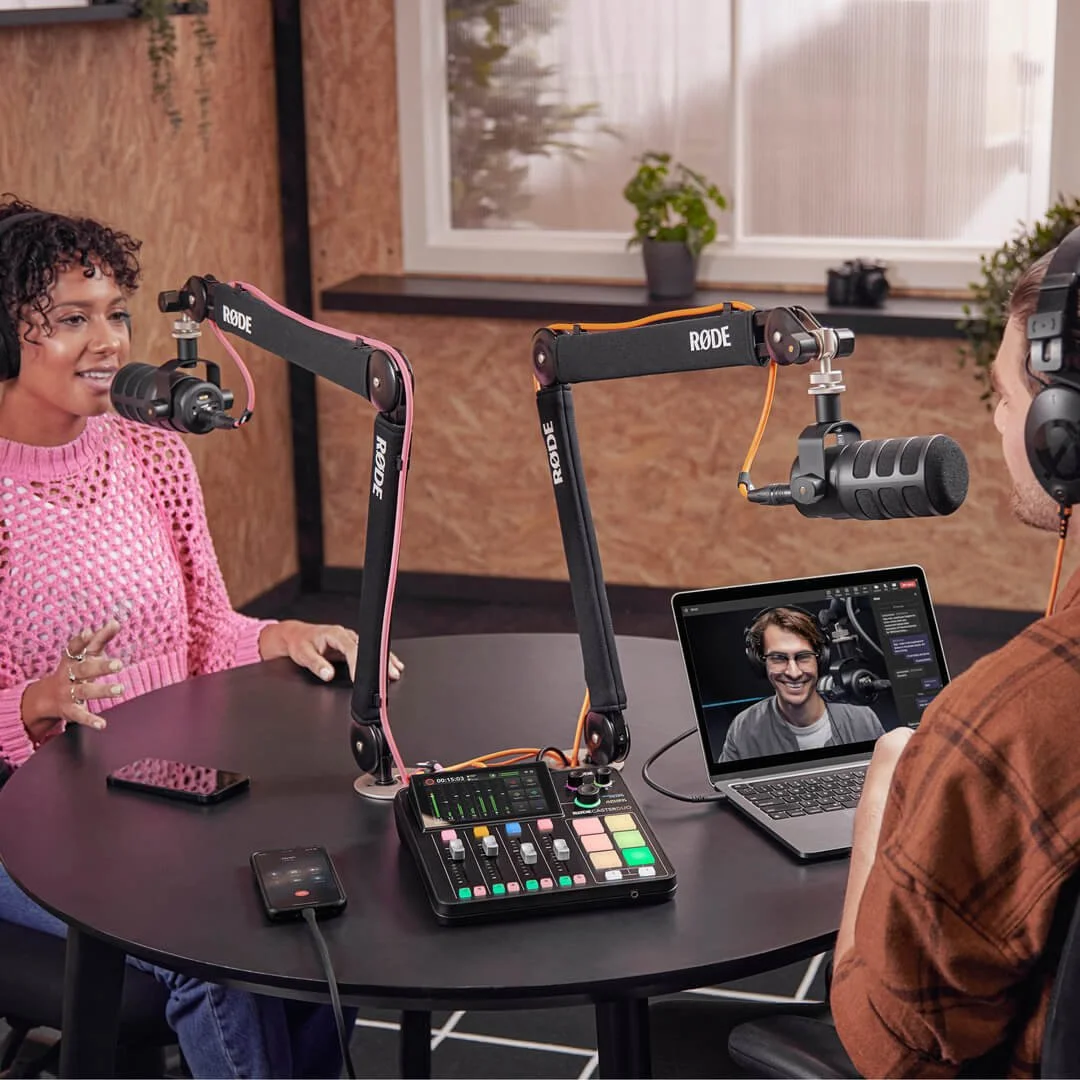
The RODECaster Duo can mix up to 4 audio sources simultaneously and stream to 2 separate USB devices at once. Fun fact: RODE started in a garage in Sydney, Australia in 1967. Photo: RODE Microphones.